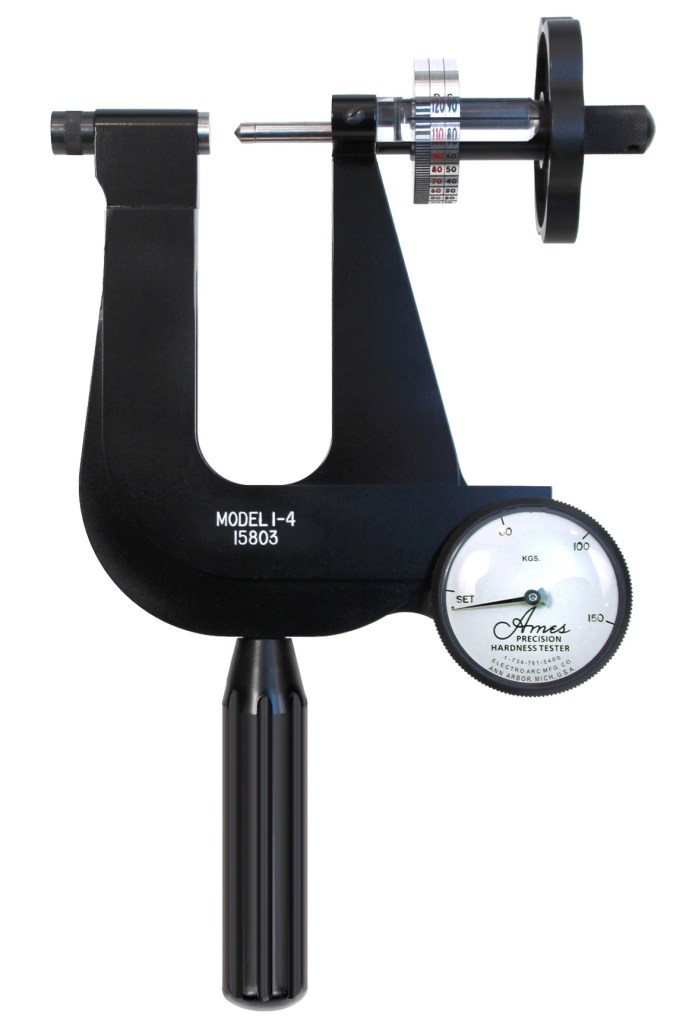
The Ames Precision Portable Hardness Tester has the ability to make true Rockwell penetrations of correct width and depth as with a bench tester, but in a portable format. The sacrifice is the barrel readout, which though direct reading, has a resolution of 2 points per graduation. They do tend to be highly repeatable and reasonably accurate.
It’s available in many sizes and variations to fit many applications, but most commonly you’ll see something like what’s to the left here.
CALIBRATION PROCEDURE
- First wipe down the tester, and if a stand is available, use the stand during calibration.
- Zero the dial by moving the bezel on the dial indicator until the needle tip is lined up with the dot. At the beginning of the test, with no pressure applied to the specimen/block, you want the needle to be resting on the dot.
- Slowly turn the hand wheel to apply the minor load to the specimen/block. Turn in a slow and consistent motion until you’ve reached the “SET” line on the dial.
- The barrel on the spindle where you take your readings should now be zeroed. This is done by turning the barrel until the pin is touching against the top of the plastic/glass magnifier strip.
- Now you can apply your major load. Turn the hand wheel slowly until you reach the marking for the force you wish to apply (60, 100, 150 for Regular Rockwell or 15, 30, 45 for Superficial Rockwell).
- Once you’ve reached the line for your force marking, you can turn the hand wheel backwards to remove the major load and return to your minor load “SET” marking.
- The reading is now taken on the barrel through the plastic/glass magnifier strip.
- Your reading should be within the tolerance of the test block as with a regular Rockwell hardness tester. There are not special tolerances, but there are worn parts, bad blocks, and perhaps some of the issues below which could affect your readings. Keep in mind the resolution of 2 for each graduation may limit your ability to get accurate readings as well.
- Repeat this process in five positions on each block. It’s recommended that you check at least 2 ranges in each scale (Low, Mid, High) to prove linearity and accuracy across the full range of the scale being checked.
COMMON ISSUES
- You need to be using the proper indenter (ex. Diamond for C scale and 1/16 ball for B scale). You also need to read the proper column on the barrel, as there are both a B and C column for the regular Rockwell scale models. With A you read the C column. With superficial testers there is one column N-T.
- When applying the major load, you need to slowly apply until you hit the line for your force marking exactly. If you overshoot it, you will get an inaccurate reading, so you have to start your test over. You can’t correct and turn the hand wheel backwards real quick, it doesn’t work that way. Throw away the reading and start over.
- The block/specimen needs to sit flat against the anvil. Use the flat anvil or raised spot anvil. Do not use the cylindrical, convex, or V anvils during calibration.
- If you’re getting accurate readings in C scale but inaccurate readings in B scale, check your B indenter. If the tester is used with the 1/16 B indenter and is taken up to 150 KGF or used with a steel C scale test block, it could damage the indenter. This is not uncommon.
- If you changed the anvil or the indenter, it needs to be reseated prior to your beginning the calibration. Take 2-3 readings and throw them out before starting calibration. The force from these thrown out tests will properly seat the anvil or indenter for use. Note that your initial readings that you throw out should be lower than what you’re looking for.
- Make sure you aren’t accidentally moving the bezel or barrel at some point during the testing process. Both are fairly loose and easy to knock.
- Make sure you’re looking straight into the line of the magnifier strip, and not holding or looking on an angle.

Leave a comment